Late in 2015, the demise of the Holga range of “toy” cameras was announced, to a collective weeping from many photographers on the net. Now I have to admit that I’ve never been really into the toy camera aesthetic; although the camera may be relatively cheap compared to other medium format cameras, the purchase and processing costs for 120 film are just as expensive and you could choose to buy an old medium format folder for £25-£30 instead and get the joys of multiple shutter speeds and variable apertures, together with better image quality.
However I do possess one Holga, which is the WPC120 pinhole model. Whereas the average Holga has maybe two apertures and one shutter speed and a very basic lens, the pinhole has one tiny aperture of f/135, no shutter speed except ‘B’, and no lens. It takes 120 film and, using one of two supplied masks, can shoot either 6*9cm or 6*12cm images.

Lots of people make their own pinhole cameras, but I’ve never got round to doing so, and my DIY skills only just extend to changing a lightbulb. Compared to the most basic level DIY approach, you do get some useful features for the £25 or so I paid:
- A very useful spirit level
- Etched guide lines to give you some idea of what will be in the picture (there is no viewfinder)
- A shutter release with a socket for a standard cable release.
- A tripod socket

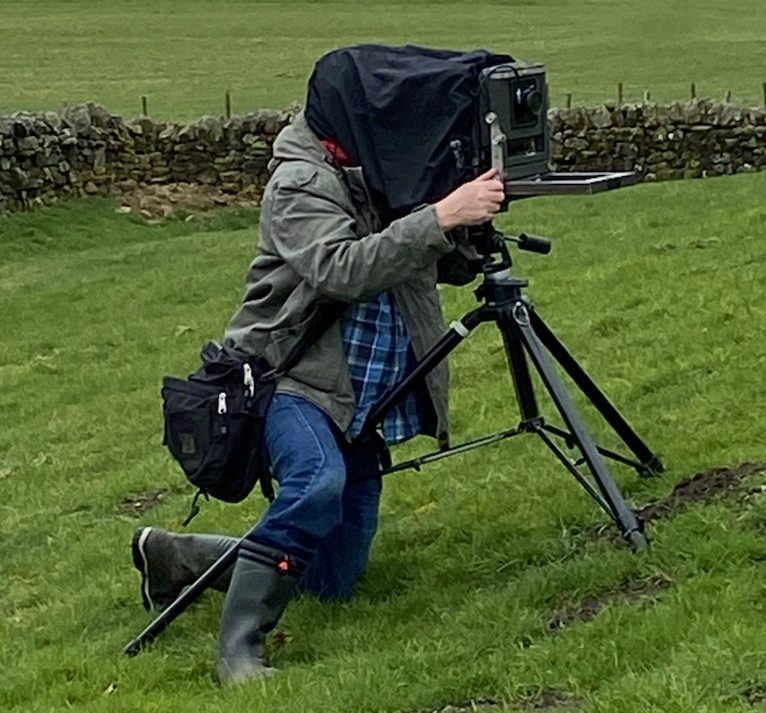
On the down side, and compared with more expensive commercially-available pinholes, it must be said that the build quality of the Holga is pretty awful. The main issue is the probability of the back falling off the camera, and light leaks. To reduce the chances of leaks and falling apart, I usually have the Holga swathed in black duck tape when in use – not pretty but it helps a lot.
You may notice in the picture above, that the area around the pinhole looks scratched. The reason for that is that many users find that, when taking 6*12cm images, there is very serious vignetting at the edges of the image. This can be reduced or eliminated by filing down or sandpapering the lip around the pinhole, as I have done. Some users report that their unmodified 120WPC doesn’t vignette at all – which reminds us that poor quality control means that no two Holgas are the same.

Southwark Cathedral, London – Fuji Acros film developed in Fotospeed FD10 developer.

The Shard viewed from a community garden.


Cathedral Church of St Nicholas, Newcastle upon Tyne – Fuji Acros film developed in Fotospeed FD10 developer. A dark church with an F/133 aperture tends to result in 15 minute exposures.
You can get a surprising amount of detail from a pinhole! Although pinholes can be a bit hit and miss, I find that when the images work well, my WPC120 produces what I consider to be a good quality image by pinhole standards.


River Pattack, Scotland, Kodak TMax 100 film

The Sage, Gateshead – a favourite from my first outing with the Holga. TMax 100 developed in Fotospeed FD10.


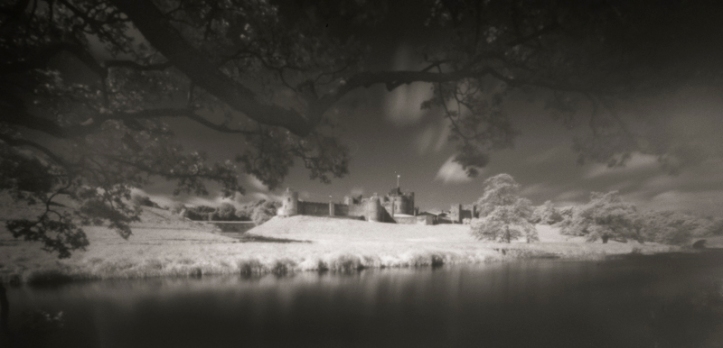
Belsay Hall in Northumberland. This was my second attempt, with 8-minute exposure; after the first try the back fell of the camera exposing the film- so I had to load another roll then stand through another 8-minute exposure.

Infrared pinholes are fun when they work well – but if you multiply the low average success rate of infrared times the low average success rate of pinholes, you may go through a whole film to get one that works well.
These were shot on Rollei IR 400 film rated at ISO 6 with a Hoya R72 filter. The Holga doesn’t have a filter thread but I just stick a 52mm filter over the front and hope it doesn’t fall off. The film was semi-stand developed in Rodinal 1:100 for one hour.

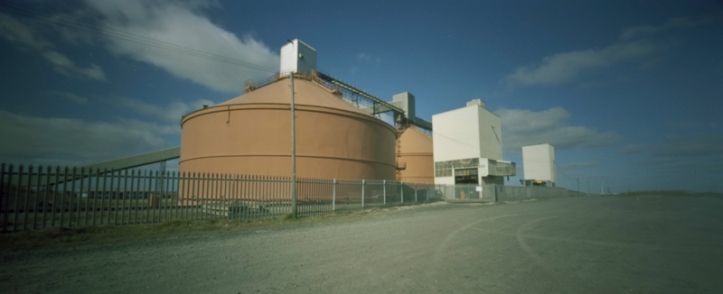
I usually shoot pinholes in black and white but the occasional colour can work well too. Kodak Portra 160VC developed in the Digibase C41 kit.

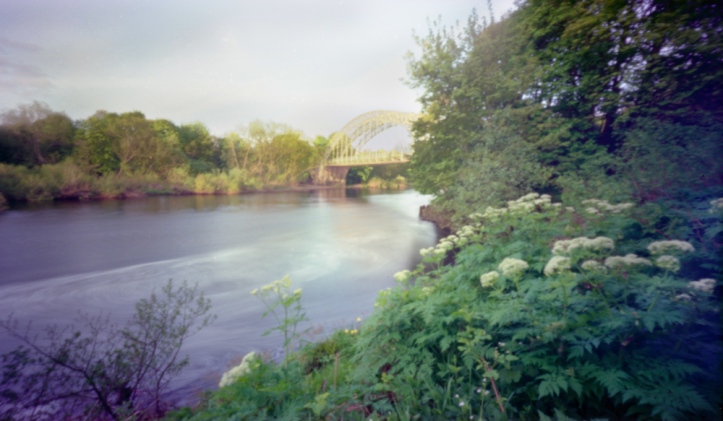
Above two shots are Portra 400 developed in the Digibase C41 kit, at Wylam on the River Tyne.
Although I’ve enjoyed using the WPC120 despite the flimsy construction, I’m on the waiting list for an Ondu wooden pinhole camera. I’ve ordered a model which can give 6*12, 6*9, or 6*6cm images. As well as hoping for better construction quality, the 6*6cm option is attractive because I’d like to print some darkroom images in the darkroom but my enlarger only handles negatives up to 6*7cm, so I can’t print the WPC images through the enlarger.
The ONDU may take some time to arrive, though, so I may get the chance to run another roll through the Holga. One advantage of the Holga I forgot to mention is it’s very light and easy to pack, so I may well carry both the Ondu and the Holga to allow both colour and B&W options.

These are quite lovely, especially the Sage shots. I am also waiting on a multiformat ONDU, and I am excited for the possibilities in the 6×12 format.
LikeLiked by 1 person
Sad to hear the Holga is gone, didn’t realise it had happened. Wonderful series of photos you have made with the pinhole model.
LikeLiked by 1 person
[…] the last feature was good for pinhole photography with the Holga WPC120, which had an aperture of f/133, but the Ondo has an aperture of, I think, around […]
LikeLike
I have a Holga WPC120. Knowing the faults and possible light leaks and I didn’t want to use tape. What I did was place it in a black neoprene zippered bag with holes cut for the lens and a shutter release. Worked great and like you got hit and miss results but the hits made all the misses worth while. I also glued a 62mm stepping ring around the lens allowing the use filters. The camera now sits in my camera case. I’ve moved to a pinhole 4×5 with a 6×9 120 back with movement. Robert from London Canada
LikeLiked by 1 person
You intrigued my curiosity with this well written and illustrated review. Enough to part with cash to acquire one. Now to find the time to shoot! Thanks.
LikeLiked by 1 person
Thanks Russell – I look forward to seeing your results.
LikeLike
Ha, me, too!!!
LikeLike