For the last few years I’ve gone through phases of looking at large-format cameras on the web; the attractions being the larger negative and, more importantly, movements. I’ve admired the images of top photographers such as Joe Cornish and David Ward, with their front-to-back sharpness, and wanted to achieve the same effects.
However I’ve held back from large format because of the amount of extra equipment I’d need:
- the camera
- at least two lenses, one “standard” and one wide angle
- dark slides
- a loupe
- a dark cloth
- a different developing tank and spirals
- for darkroom prints, a new enlarger, which might not even fit into the space available
The next step in my thinking was that perhaps I could achieve what I wanted by using a roll-film back on a view camera. I reasoned that the bigger negative wasn’t really essential. I get enough quality for my purposes from the 6*7 negatives in my Mamiya RZ67 (actually they are more like 56mm * 69mm). I’ve never looked at one of those images and thought “I really need more resolution”.
Using a roll film back on a view camera would obviate the need for new spirals and a new enlarger; the film would be cheaper too. There is even an adapter that would allow me to use my existing RZ67 backs on a large format camera. But the stumbling block, apart from other demands on time and money, was that to get a wide-angle view would require buying a new lens such as a 47mm or 65mm. Whilst large format 90mm lens can be picked up at reasonable prices, the wider lenses – which would be a super wide on 4*5 but just fairly wide on 6*7 – tend to be a lot more expensive.
So, after much thought, I ended up buying the “NI701 Shift Tilt Adaptor” for the Mamiya RZ67, together with the Mamiya 75mm f4.5 SB lens. The “SB” stands for “Short Barrel”; the shorter length of the lens makes up for the extra extension provided in the barrel of the adaptor, so that the lens can be focussed to infinity.

The adaptor provides 12mm upward shift, 12mm downward shift, 12mm forward tilt, and 12mm downward shift. There is no “swing” facility, but if your tripod is strong enough, you can turn the camera on its’ side to achieve a swing movement. In the same manner, you could achieve a horizontal shift movement.
Now large format enthusiasts will point out that 12mm of movements is tiny compared to what a typical view camera can achieve. This is undoubtedly true and I haven’t yet got enough experience to determine how much of a limitation this is for my style of photography. I was concerned about this point until I found out that the modern T/S lenses for Canon and Nikon full-frame DSLRs have about the same amount of movements (for about three times the cost).
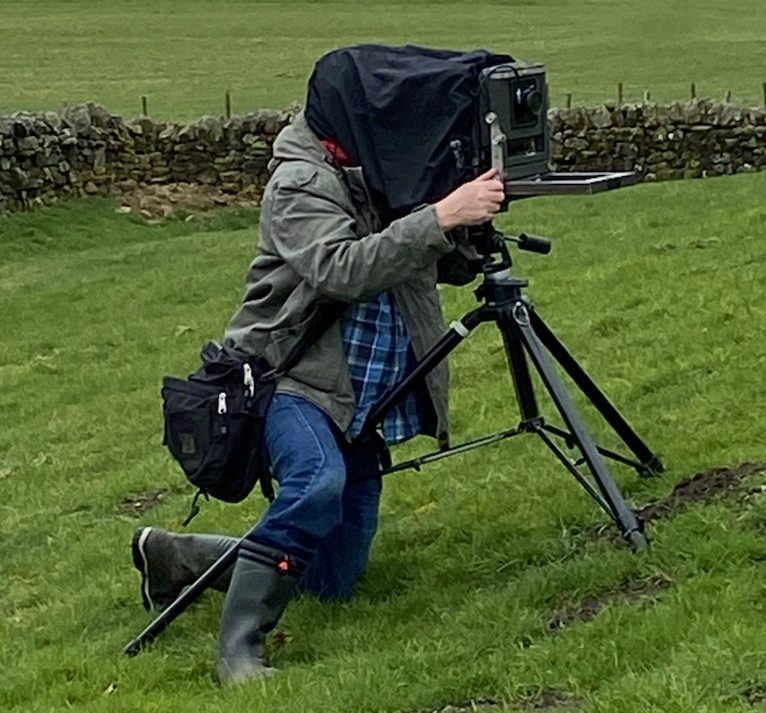
So, now to see how it worked out in practice. After a bit of playing around without any film to see how the movements worked, and then a first film shooting some flowers at home, I got round to some real world tests.
The first group were shot with the Mamiya 110mm f2.8 lens as the 75mm lens hadn’t been delivered yet. These were all taken at home with Ilford FP4+ developed in the Firstcall B&W film developer.


Next up was a trip to Lanercost Priory, which I envisaged would give an opportunity to try out some shift movements to straighten the verticals in the building. The first two shots were in Ilford XP2 film, developed in the Fuji Hunt C41 chemicals.


The remaining shots were taken on Fuji Acros, again developed in the Firstcall B&W developer. The toning was applied in Lightroom.

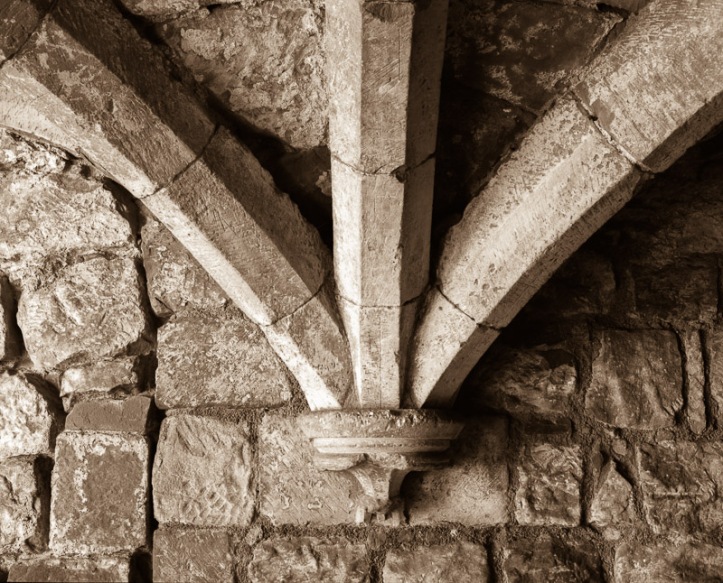


On the way home I still had three shots left on the roll of Acros so I stopped off at Hexham Abbey for some more architectural shots. I knew that this subject would challenge the shift capability to the limit.

In the event, the result you see above did have a small amount of additional perspective correction carried out in Lightroom; after applying the full 12 degrees of upward shift on the adapter;but I got much closer to the result I wanted than I would have without the adapter, and I could probably achieve the final correction in the darkroom by tilting the easel. Mamiya also have a Shift 75mm lens which has 20mm of up or down shift, but no tilt capability, but this would not be as versatile for general use as the 75mm SB lens in conjunction with the tilt and shift capability of the adapter.
At this point I should talk about what lenses can be used with the adapter. The 75mm SB lens focusses to infinity and I’ve found the focal length to be fairly useful for architecture and landscapes, although a wider lens would be handy. The 35mm-equivalent focal length is 36mm.
There is also a 180mm SB lens (90mm equivalent in 35mm terms) which can focus to infinity with the adaptor. I don’t have this lens and don’t think I’m likely to need it for the images I take.
The other lenses which are recommended for use with the adapter, but which can’t be focussed to infinity, are:
- 140mm macro
- 150mm f3.5
- 180mm f4.5 (I have this lens but haven’t tried it yet with the adapter)
- 210mm f4.5 APO
The ever-useful Mike Butkus has the manual for the adapter here;you might want to send him a donation to say thanks.
The manual warns that vignetting may occur in some situations; I have observed this through the finder with the DoF preview in use, but I’ve not actually noticed it in any of the images I’ve taken.


The 75mm lens is significantly heavier,at 1295g, than any other Mamiya lens I have, and has an enormous 105mm filter thread. The adapter is not heavy but it is an awkward shape to pack in my bag. As a result, it’s likely that when I want to take the 75mm lens out, it may be the only lens I pack.
Finally, here’s an image where I got the movements completely wrong.

I was concentrating on getting the bluebells in focus and failed to notice that the tree trunk is completely out of focus; forgetting that tilt may be useful for gently sloping subjects but can’t cope with a vertical object in the middle of the frame !
In summary, I have found that the 75mm SB lens, combined with the adapter, is pretty useful for many landscapes and moderately-challenging architectural features, as well as for close-ups. The adapter also works well with the 110mm lens for close-up work. But the limited lens choice with the adapter, and the relatively limited amount of movement, means that this setup will not suit everyone as an alternative to a full view-camera kit. If you’re already an owner of an RZ67, it may attract you, but if you’re not already an RZ owner I doubt that you would choose this route as a way of getting into camera movements.

Great results. Are there advantages to this particular setup over something like the Fuji GX680?
LikeLike
I’ve never used the Fuji GX680 so I can only comment on what I have read about the camera. As far as I understand it, the Fuji has a greater range of lenses which can use the camera movements and still achieve infinity focus, so if you’re not already invested in RZ67 kit, the Fuji might be a better option. There are also medium-format view cameras such as the Horseman VH.
LikeLiked by 1 person
Hi Kevin I was wondering what the lens is that I need. Is it the 75mm floating lens.
LikeLike
The full name of the lens is Mamiya 75mm f4.5 L SB
SB is for short barrel which is short because the NI701 already takes up space between the camera body and the lens. There is also a 180mm SB lens which I never used. Other lenses can be attached but will not achieve infinity focus.
LikeLike
Brilliant! This post answers many of my questions regarding the tilt/shift adapter with excellent examples. I’m keen to get into large format also, but as an existing RZ owner—this makes sense to get familiar with first.
—
Great website, I’ll come back to this again! 😬
LikeLiked by 1 person
Thanks for the review! Very interesting.
LikeLiked by 1 person
I’ve been using (or trying to) a t/s adapter with my Mamiya RZ… So your article is most welcome! Exactly the information I was looking for.. And even if I already have the adapter readign about someone elses experience makes us aware of the pitfalls. Thanks!
LikeLike
Beautiful images. I have been considering buying this adapter but using it for portraits. Have you ever used it for these purposes?
Thanks and regards
LikeLiked by 1 person
No, I don’t really do portraits at all.
LikeLike